Order settings
The Order settings tab is where we can set the basic rules for placing orders.
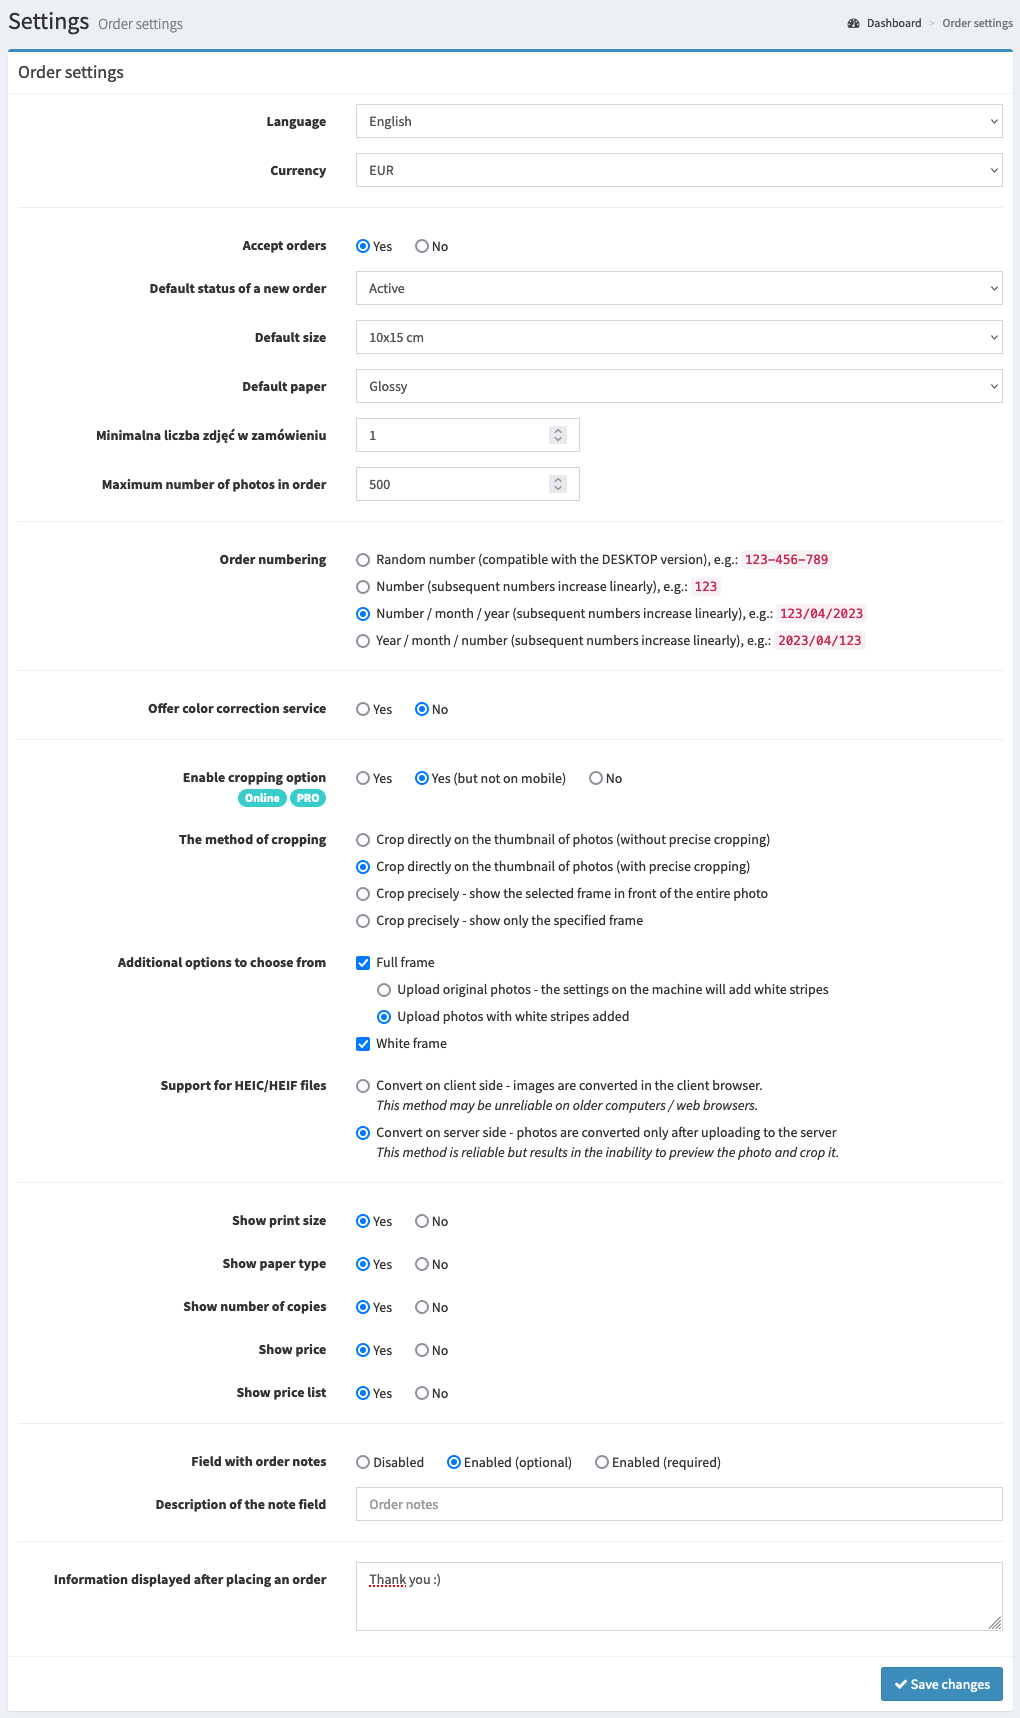
Available Options
Here is the list of available options with a brief explanation.
- Currency
Defines which currency will be used when placing the order.
- Accept orders
Specifies whether customers can place orders.
- Default status of a new order
Specifies what status newly placed orders will have.
- Default size
Specify the default print size selected when the order is placed.
- Default paper
Specifies the default paper type that will be selected when placing an order.
- Maximum number of images per order
Determines how many images a customer can upload within a single order. The maximum limit that can be set is 1000 images. This limitation enforces the size of the file that will be generated for download. However, keep in mind that the limit on the number of pictures for an order has nothing to do with the total number of prints ordered. Each image can be ordered in any number of copies.
- Order numbering
Specifies how the order numbering will be done. The available options are:
Random numberis the default numbering method, which generates random numbers for each order. The advantage of this method is that you cannot tell how many orders have already been placed. An example form of such an order number is:123-456-789.Number- generates consecutive numbers. An example form of such an order number is:123Number / month / year- generates consecutive numbers and adds the current month and year to them. An example form of such an order number is:123/03/2021Year / month / number"- generates consecutive numbers and adds the current month and year before them. An example form of such an order number is:2021/03/123
- Enable framing option
Specifies whether the customer will have access to the option of cropping the image when placing the order.
For this option to be active for a given print format, it is necessary to set a minimum image size.
- Framing method
Specifies what the thumbnail of the photo will represent after cropping. The available options are:
Crop directly on photo thumbnail (no precision cropping allowed). This mode makes it possible to crop directly on the thumbnails and ensures that the photos are always automatically cropped correctly. As long as they meet the minimum size requirements for the print format, of course. Precise cropping, however, is not available.Crop directly on photo thumbnail (with precision cropping capability). This mode ensures that you can crop photos directly on the thumbnail and that the images are always automatically cropped correctly. As long as they meet the minimum size requirements for the print format, of course. Precision cropping is still available and, as with the other modes, is activated by clicking on a particular button.Crop precisely - show the selected frame in front of the entire photo. Cropping is available in a separate window in this mode, which opens by clicking on a particular button. After the approval, you will see the selected frame in the background of the whole picture as a thumbnail.Crop precisely - show only the specified frame. The cropping is available in a separate window that opens after clicking on a particular button in this mode. When approved, only the specified frame is shown as a thumbnail.
The first mode is incredibly convenient when we have to deal with many pictures. You can quickly see and change the cropping of the photo without having to open the cropping tool again.
- Additional options to choose from
Defines additional options that the customer can select for the image. The other options are only available if thumbnail photo cropping is active.
Full frame- selecting this option will enable the customer to choose the “Full frame” option for the photo. Such photos will be placed in a particular folder. Moreover, here we have to decide on the form in which the full-frame photos will be delivered. We have two options to choose from:Upload original photos - the settings on the machine will add white stripes
Send photos with white stripes added
White frame- by checking this option, the customer will be able to select the “White frame” option for the photo. Such photos will be placed in a particular folder.
- HEIC/HEIF file support
Convert on client side- images are converted in the client browser.This method may be unreliable on older computers / web browsers.
Convert on server side- photos are converted only after uploading to the server.This method is reliable, but results in the inability to preview the photo and crop it.
- Show print size
Specify whether a print size choice will be available (shown) when placing an order. If not, then the default print size will be used.
- Show paper type
When placing an order, determine whether a paper type selection will be available (shown). If not, the default paper type will be used.
- Show number of copies
Determines if a choice of a number of copies will be available (shown) when placing an order. If not, each image will have the quantity set to
1.- Show price
Determines whether the price will be shown when placing an order.
- Show price list
Specifies whether the
Price listoption will be shown on the top bar when an order is placed. After clicking this option, customers will be able to see a table with the price list for prints.- Order remarks field
Specifies whether an order remarks field will be shown when an order is placed. Order comments can also be optional or required.
- The message displayed after the order is placed
Specifies what message will be displayed to the customer after the order is placed.