Print formats
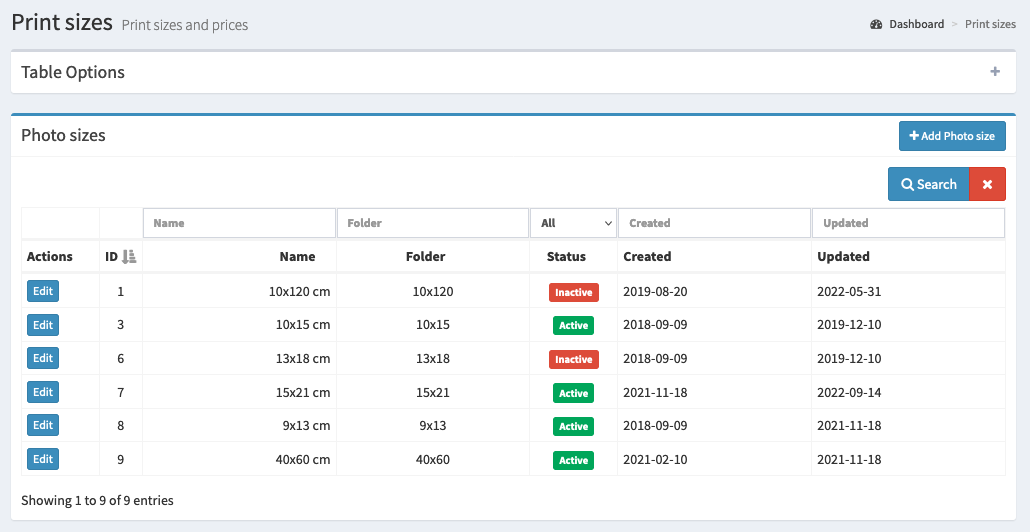
The tab Print formats are where we can set the sizes, and the price list can depend on the number of prints you want to order.

The basic information you will find here is:
A name for the size of the photos
The name of the folder where the photos will be placed
Status of the format (it decides whether the given format is available for customers)
By default, we have 5 basic sizes with sample prices, but you can modify them or add your own formats.
The order of displayed formats can be changed by placing the mouse cursor over the ID column and dragging up/down the given position in the table.
Edit format

Size
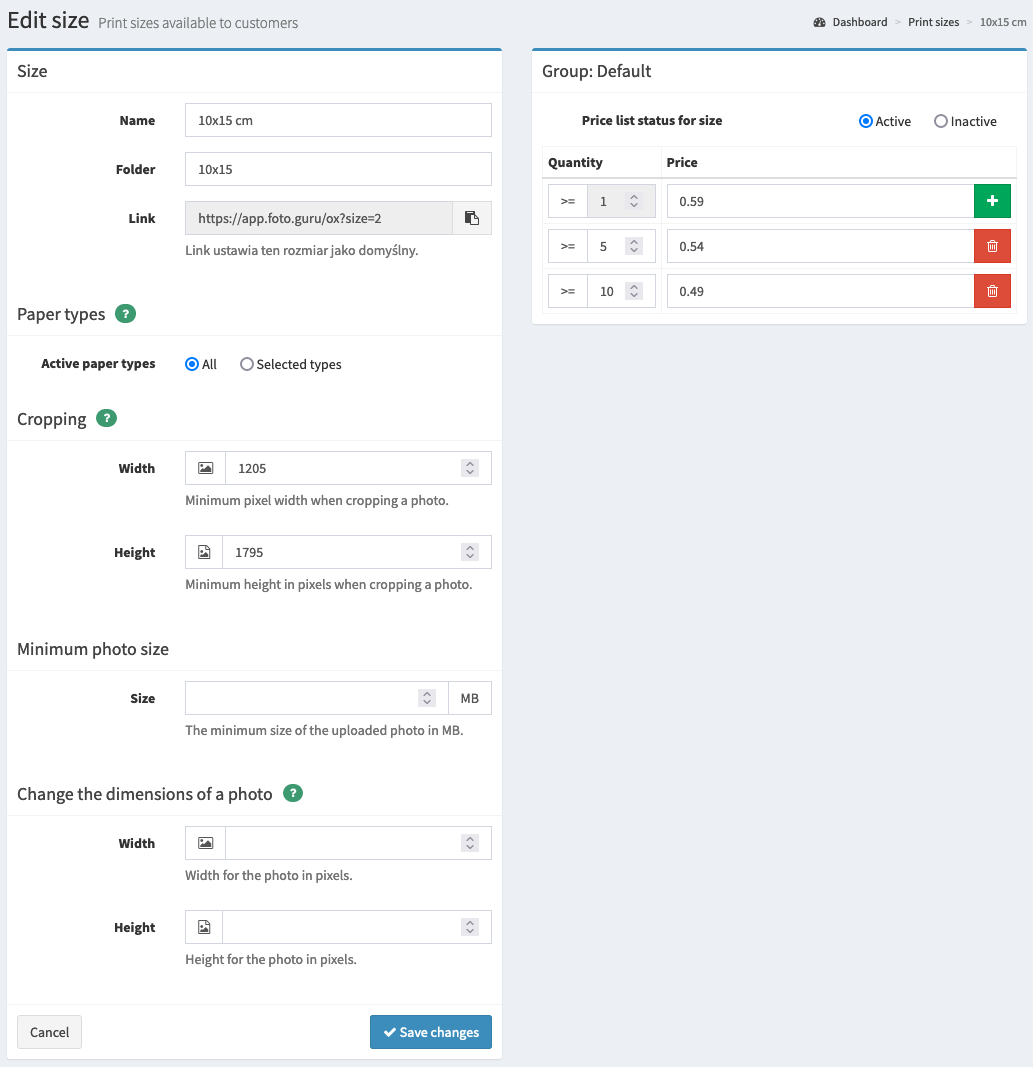
First, we can specify a name for the size and its status. The directory determines which folder the images will be placed in when a package with images for download is prepared. The name will appear as a customer selection option when placing an order.
Group
The next option is the Price which can be differentiated according to the number of images the customer decides to order. This allows us to offer a more attractive price if more prints are ordered. You can define the number of photos from which the price will differ. The price variants can be added with the green plus button and removed with the red icon next to the variant.
A given size shall be available only when its status is active. We can have multiple pricing groups for a given image format, offering selected customers special pricing for prints. More details can be found on the Print Prices page.
Paper types
The Active paper types option determines which paper types the given format will be available. By default, each paper type is available for all print formats. However, sometimes we want to make exceptions, and here it is possible. For example, we can set that the 9x13 format will have only glossy paper available.
Cropping
The option Cropping defines the minimum width and height of the picture that can be set when the customer crores the picture while placing the order. Please note that this option is only needed if you want to allow customers to crop their photos.
The values set here should guarantee the excellent quality of the photo after printing.
Tip
Pay attention to what dimensions you enter because they are also responsible for the aspect ratio. When changing the dimensions, ensure that the aspect ratio is correct for the given print format.
Minimum image size
The Minimum Image Size option sets the minimum size in MB that an image must have to be processed without problems. If the image size is smaller, the customer will see a warning that the image may be of insufficient quality.
Image resizing
This option allows you to automatically resize images to the given dimensions. This is very useful when customers upload large photos but want to order smaller size prints. Thanks to this option, we can quickly resize the images and get a smaller packet of pictures, which means that the photos will be downloaded faster.
If the sent images do not precisely match the defined proportions, they will be reduced proportionally - without “flattening” i.e., the correct proportions will be maintained.
If the customer sends smaller photos than the specified dimensions, such images will not undergo any processing and will be transmitted in their original form.
Adding the format
Adding your own format is done the same way as editing an existing format.