Products
The Products tab (available separately for each category in the Photo products menu) is the place where we can define which products are available within a given category.
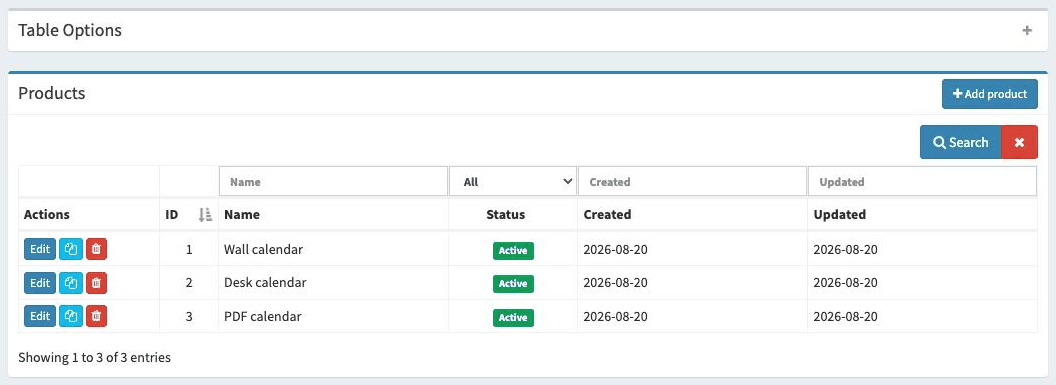
Available options
Here is a list of the available options with a short explanation.
- ID
The sequence number according to which the products will be displayed. The order can be changed by dragging rows up/down.
- Name
Product name.
- Status
Decides whether the product is available to customers.
In the Actions column, apart from editing and deleting, there is also a Duplicate button, which creates a copy of the product together with all its components and prices. It is useful when adding several similar products.
Editing a product
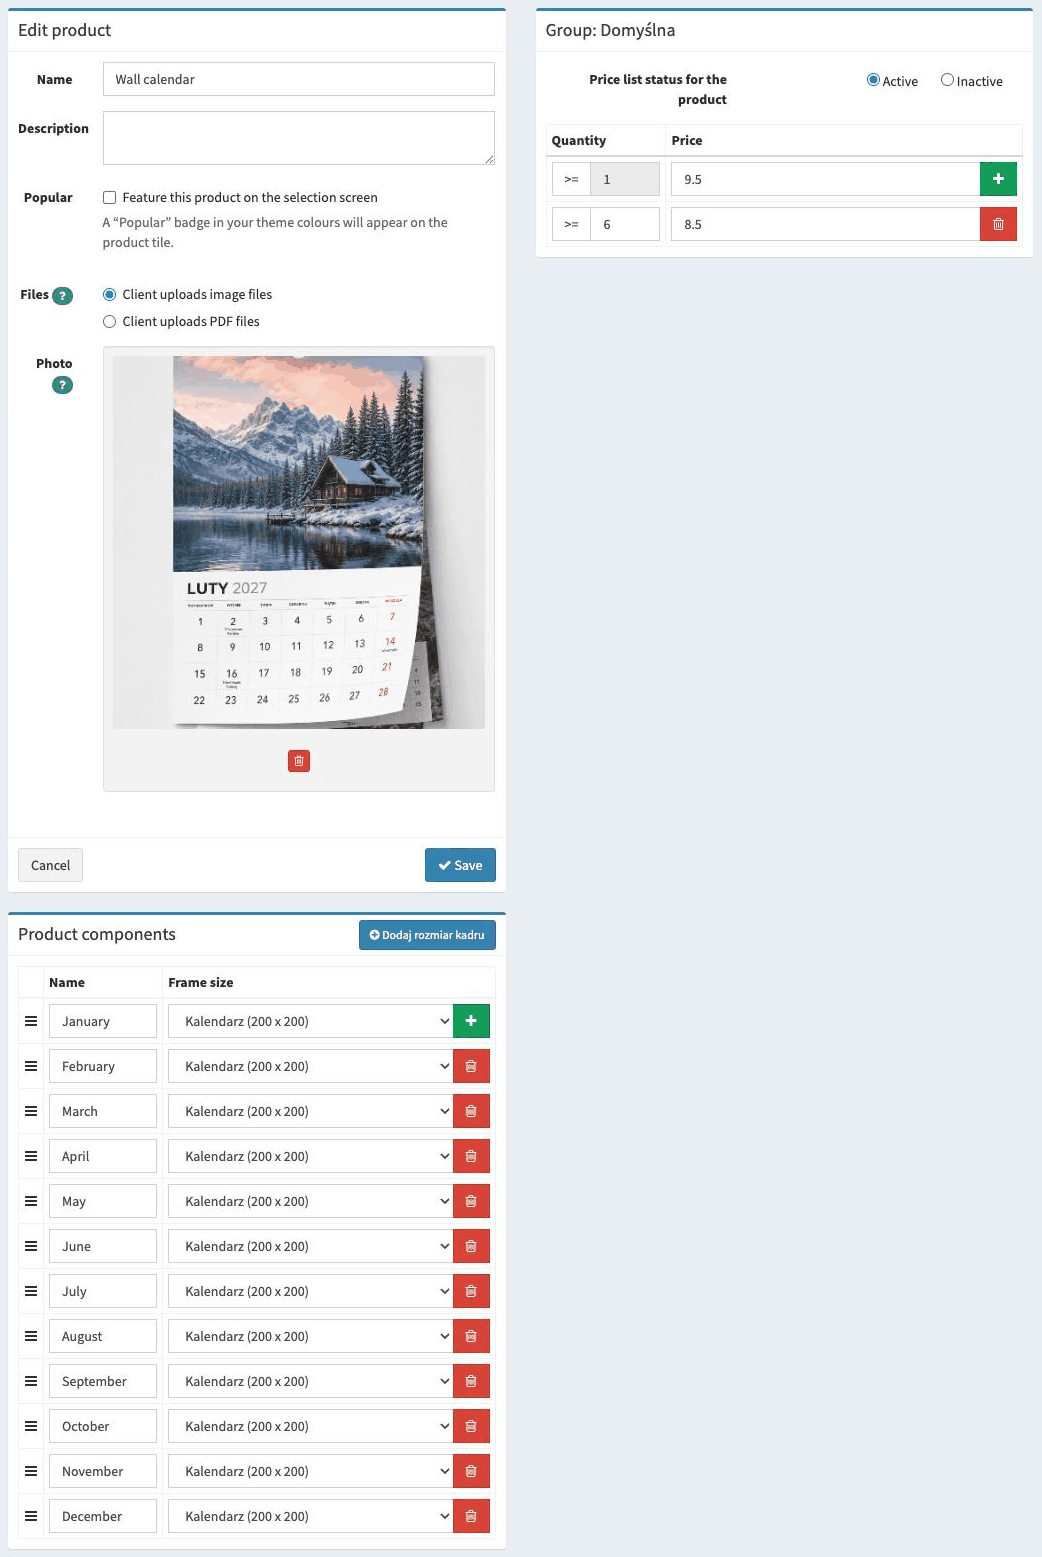
Here we can define the product name, its description, the type of files uploaded by the customer and the photo. On the right-hand side we set the price and status of the product separately for each price group.
- Name
The product name the customer sees.
- Description
The product description visible to the customer.
- Popular
Ticking this option will highlight the product on the selection screen with a “Popular” badge in your theme colours.
- Files
We decide whether the customer will upload image files or PDF files.
PDF files allow a print-ready template to be uploaded. For this you can use, for example, the Canva service, in which the customer can prepare such a file/files. In the case of PDF files, cropping, size and dimensions are not taken into account - the files uploaded by the customer are sent unchanged.
- Photo
We can upload a photo that will present the product when products are selected from the list in a given category. This will allow customers to visually confirm that they are interested in this particular product design.
The photo size should be 420 x 420 pixels. Larger photos will be scaled to these dimensions.
- Price list status for the product
Determines whether the product is available to customers using the given price group.
- Quantity / Price
The product price list depending on the quantity ordered. Further thresholds are added with the green plus button.
Product components
In addition, we need to define which components make up the product, i.e. how many photos and in which frame sizes the customer must upload. This can be any number of photos - e.g. a wall calendar may consist of 12 photos (one for each month), and a mug of one photo. In this way we can create any product.
Each component has its own name (visible to the customer, e.g. “January”, “Front”) and a frame size. The order of the components can be changed by dragging rows with the handle on the left.
Adding a product
Adding a new product works in the same way as editing an existing one. Only the photo field becomes available after the product has been saved.